- BY Nor Ibrahim
- POSTED IN Articles
- WITH 0 COMMENTS
- PERMALINK
- STANDARD POST TYPE
From Scan to Strategy: FARO Quantum X in Modern Metrology Workflows
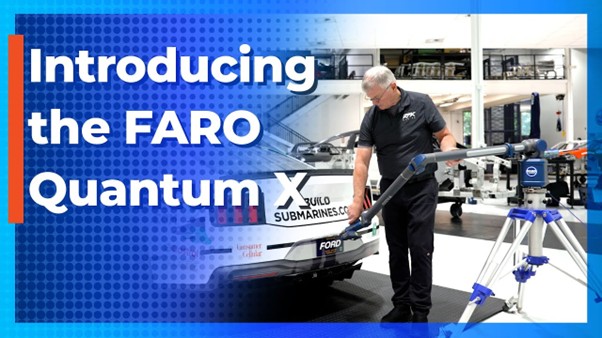
In today’s fast-paced manufacturing environment, precision isn’t a luxury—it’s a necessity. With increasing pressure to reduce cycle times and minimize errors, manufacturers are turning to metrology not just as a quality assurance tool but as a cornerstone of strategic operations. Enter the FARO Quantum X—a groundbreaking Portable Coordinate Measuring Machine (PCMM) that does more than measure. It empowers teams to move from scan to strategy, translating raw dimensional data into real-time decisions that drive performance and efficiency.
The Shift from Data Capture to Data-Driven Strategy
Traditional metrology was often isolated, conducted in labs and detached from the real-time needs of the factory floor. FARO Quantum X breaks that mold. It brings precision inspection directly to production, enabling engineers to scan dies, assemblies, and components where they’re made. This mobility streamlines workflows, reduces part handling, and improves responsiveness.
Rather than just logging data, the Quantum X enables strategic actions—identifying misalignments, validating fit, minimizing downtime, and accelerating decision-making. It’s not just a tool—it’s a transformation engine.

Introducing FARO Quantum X Series: Capabilities at a Glance
Proven Accuracy and Precision
FARO Quantum X boasts industry-leading accuracy, delivering up to 15% improvement over previous models. Depending on arm length, users can expect volumetric accuracy between ~23 µm to ~63 µm, making it ideal for small parts, large dies, and everything in between.
Probing and Scanning in One Arm
Whether you’re using tactile probes for contact inspection or Laser Line Probes (LLPs) for high-speed scanning, Quantum X adapts effortlessly. Its plug-and-play design allows quick LLP integration, while its Continuous Light Rectification (CLR) technology ensures clean scans—even on dark or reflective surfaces—without needing sprays.
Ergonomics & Workflow Efficiency
Designed for ease and speed, the Quantum X features a balanced, lightweight build, internal counterbalancing for one-hand use, and rugged industrial-grade construction. The 8-Axis Max system adds a rotational axis, slashing measurement time by up to 40%. For added mobility, the arm supports wireless operation with hot-swappable batteries, freeing it from cables and cords
Workflow Integration: From Scan to Strategy
Direct Die and Assembly Inspection
Quantum X can be deployed right on the shop floor, on assembly lines, or even beside a press. No need to disassemble dies or move large parts. This direct access means faster inspections and real-time alignment checks without interrupting workflow.
Real-Time Qualitative Insights with CAM2 Software
FARO’s powerful CAM2 software connects seamlessly with Quantum X, offering robust features like GD&T analysis, automated reporting, and trend visualization. It brings your measurement process into the digital age—enabling data-driven decisions and tracking performance over time.
Actionable Outcomes
Scan data isn’t just archived—it drives action. From confirming part quality to prompting maintenance, Quantum X’s insights support immediate responses that improve product quality, reduce scrap, and maintain customer satisfaction. It’s the connection between inspection and implementation.
Models to Match Your Needs
Whether you’re a multinational factory or a small toolmaker, FARO has a Quantum X model tailored to your goals:
- Quantum X.S – Maximum precision for the most demanding tolerances
- Quantum X.M – Balanced solution for everyday inspection needs
- Quantum X.E – Cost-effective entry point into premium portable metrology
Each model supports full scanning and probing capabilities, so you’re never limited by your workflow.
Tips for Optimised Use in Metrology Workflows
- Stable Setup Is Critical: Mount the Quantum X arm on a solid table or secured tripod—avoid placing it on soft flooring or unlocked wheels, which compromise accuracy.
- Proper Probe Compensation: Regularly perform probe calibrations and ensure alignments are based on verified datum points.
- Use Compatible Software: Make sure your software license supports the latest stability and feature sets—older versions may restrict Quantum X’s full potential.
- Train Operators on Both Modes: Probing and scanning require distinct skill sets; cross-train your QA team to take full advantage of both.
- Plan Inspections Strategically: Use the 8-axis rotation and real-time feedback to design efficient inspection routines, reducing setup and turnaround time.
Conclusion
The FARO Quantum X represents a major leap in the evolution of measurement technology. It merges portability, precision, and scanning intelligence into a tool that doesn’t just collect data—it turns that data into strategic insight.
From reducing inspection times and minimizing rework to enhancing product quality and enabling real-time decisions, Quantum X empowers manufacturers to rethink how they approach quality and production workflows.
Ready to Take Your Measurement Strategy to the Next Level?
Explore the full capabilities of FARO Quantum X now with us – Malaysia’s trusted provider for FARO metrology solutions.
Visit us today to request a demo, product brochure, or expert consultation:
https://try.mawea.com.my/faro-3dscanning/

